
Battles - The Battle of Coronel, 1914
 The naval battle off the coast of central Chile, at Coronel, galvanised the British
admiralty into action once news of the complete destruction of Admiral
Sir Christopher Cradock's squadron by German
Admiral Spee filtered through.
The naval battle off the coast of central Chile, at Coronel, galvanised the British
admiralty into action once news of the complete destruction of Admiral
Sir Christopher Cradock's squadron by German
Admiral Spee filtered through.
The Royal Navy, with Japanese assistance, had spent months searching for the German East Asiatic commerce-raiding squadron known to be operating under Admiral Spee in the Pacific (Spee having moved from far eastern waters once Japan entered the war on Britain's side), without success.
News came through to the British - from an intercepted radio communication - in early October revealing details of a plan devised by Spee to prey upon shipping in the crucial trading routes along the west coast of South America. Patrolling South America at that time was Admiral Cradock's West Indies Squadron, which consisted of two armoured cruisers, Good Hope (Cradock's flagship) and Monmouth, the light cruiser Glasgow, and a converted ex-liner, Otranto.
Cradock's fleet was by no means modern or particularly strong, and certainly ill-matched when set against Spee's formidable force of five vessels, led by the armoured cruisers Scharnhorst and Gneisenau plus a further three light cruisers, all modern, efficient ships. Nevertheless he was ordered to deal with Spee.
On 18 October Spee, having heard of the solo existence of the Glasgow, set off with all five warships from Valparaiso with the intention of destroying it.
Cradock, who was aware that his shipping was outgunned by Spee's, had meanwhile been waiting in the hope of naval reinforcements. In the event the Admiralty dispatched only the Defence - an armoured cruiser, and Canopus - an elderly battleship, the latter sent from London. Neither reached Cradock before battle unexpectedly commenced on 1 November 1914.
Eventually deciding that he could wait no longer for the delayed reinforcements, Cradock determined to sail from the Falkland Islands to a predetermined rendezvous point with the Glasgow at Coronel, the latter having been sent there to gather intelligence.
At this point the First Lord of the Admiralty, Winston Churchill, in London issued orders to Cradock on 28 October instructing him to halt, pending possible reinforcement from the Japanese navy. It is a moot point as to whether Cradock actually received Churchill's instructions; in any event he shortly afterwards ordered his squadron to adopt an attacking formation.
For Cradock had received word, again via intercepted radio signal on 31 October that Leipzig - the slowest light cruiser in Spee's fleet - was in the area. He promptly ordered his squadron north to cut it off - and instead found himself confronting Spee's entire force the following day at around 4.30pm.
At this stage it is probable that the British force could have escaped by sailing towards Canopus, then some 300 miles to the south; with the failing light Spee would most likely have lost contact with the British squadron. Instead Cradock chose to stay and fight; however he ordered Otranto to break formation and flee.
With the seas difficult (to the disadvantage of the British) Spee reacted by moving his faster vessels out of Cradock's firing range; at sunset - 7pm - with the moon clearly silhouetting Cradock's fleet, he began to shell the latter's force, with Scharnhorst's third salvo crippling the flagship Good Hope; both Good Hope and Monmouth were destroyed shortly afterwards, Monmouth under repeated battering.
There were no survivors in either, Cradock himself going down with the Good Hope. Glasgow and Otranto both escaped (although the former suffered five strikes). Spee's own fleet had suffered little damage, and sailed thereafter to Valparaiso to a rapturous welcome from the local German population.
Once news of the scale of the British defeat, and its consequent humiliation, reached the British Admiralty in London a decision was quickly taken to assemble a huge naval force under Admiral Sir Frederick Sturdee. This was promptly dispatched to destroy Spee's force: which it subsequently did, at the Battle of the Falkland Islands.
Click here to view a map of naval operations in 1914.
.jpg)
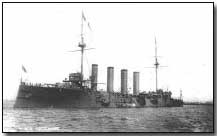
Photograph courtesy of Photos of the Great War website
"Drum Fire" was an artillery barrage fired not in salvo but by each gun in succession.
- Did you know?